How to Protect Your Outdoor AC Unit Before, During, and After a Storm

Corey Creekmore • December 16, 2025

Man playing guitar-shaped thermometer, sweating, with musical notes.

Share this article

AC Unit

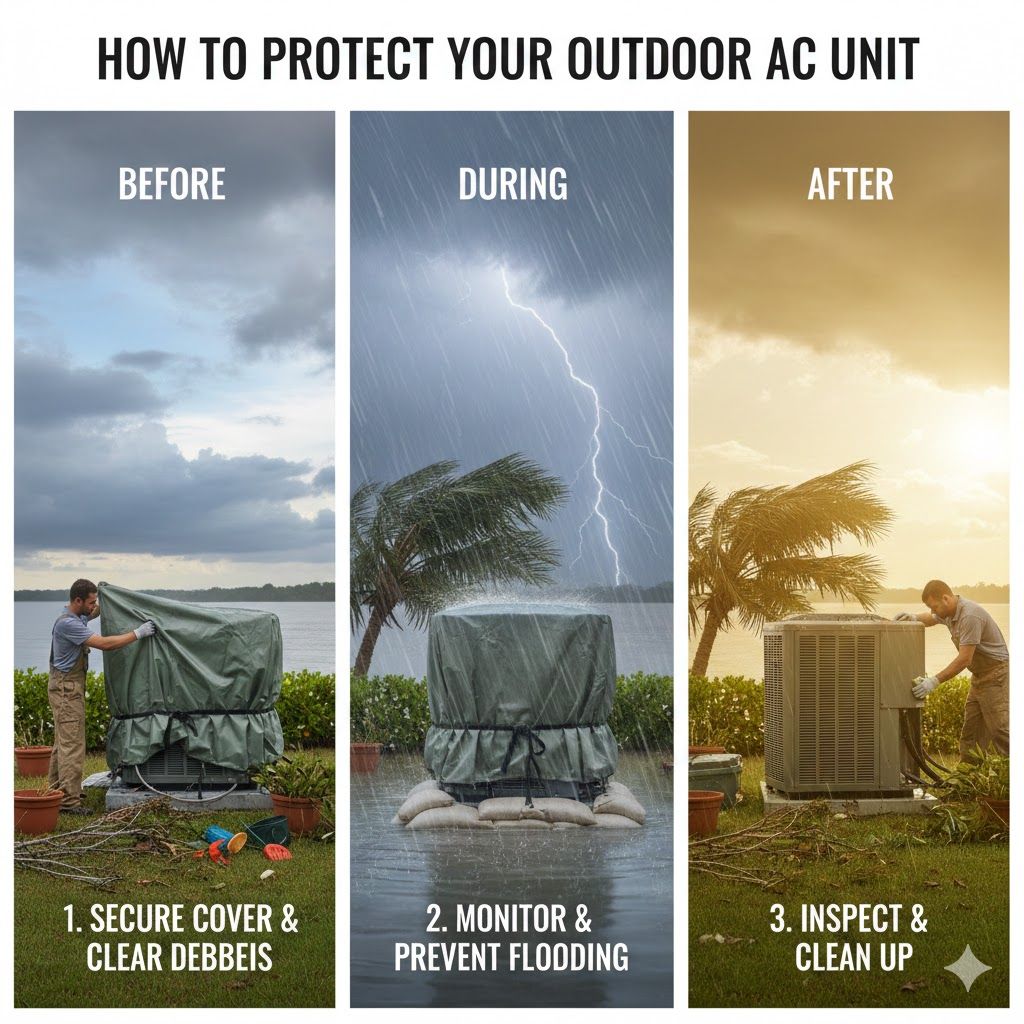
When storms roll through, your outdoor AC unit is on the front lines. High winds, flying debris, heavy rain, flooding, and lightning can all damage the AC unit and leave your home hot, humid, and uncomfortable right when you need cooling the most. Planning ahead and following a clear checklist before, during, and after a storm helps safeguard your AC unit, reduce repair costs, and protect your family’s comfort and safety.


This guide explains step-by-step how to protect your outdoor AC unit before a storm hits, what to do with the AC unit while the storm is happening, and how to safely bring the AC unit back online and check for damage afterward.


Why storm protection matters for your AC unit

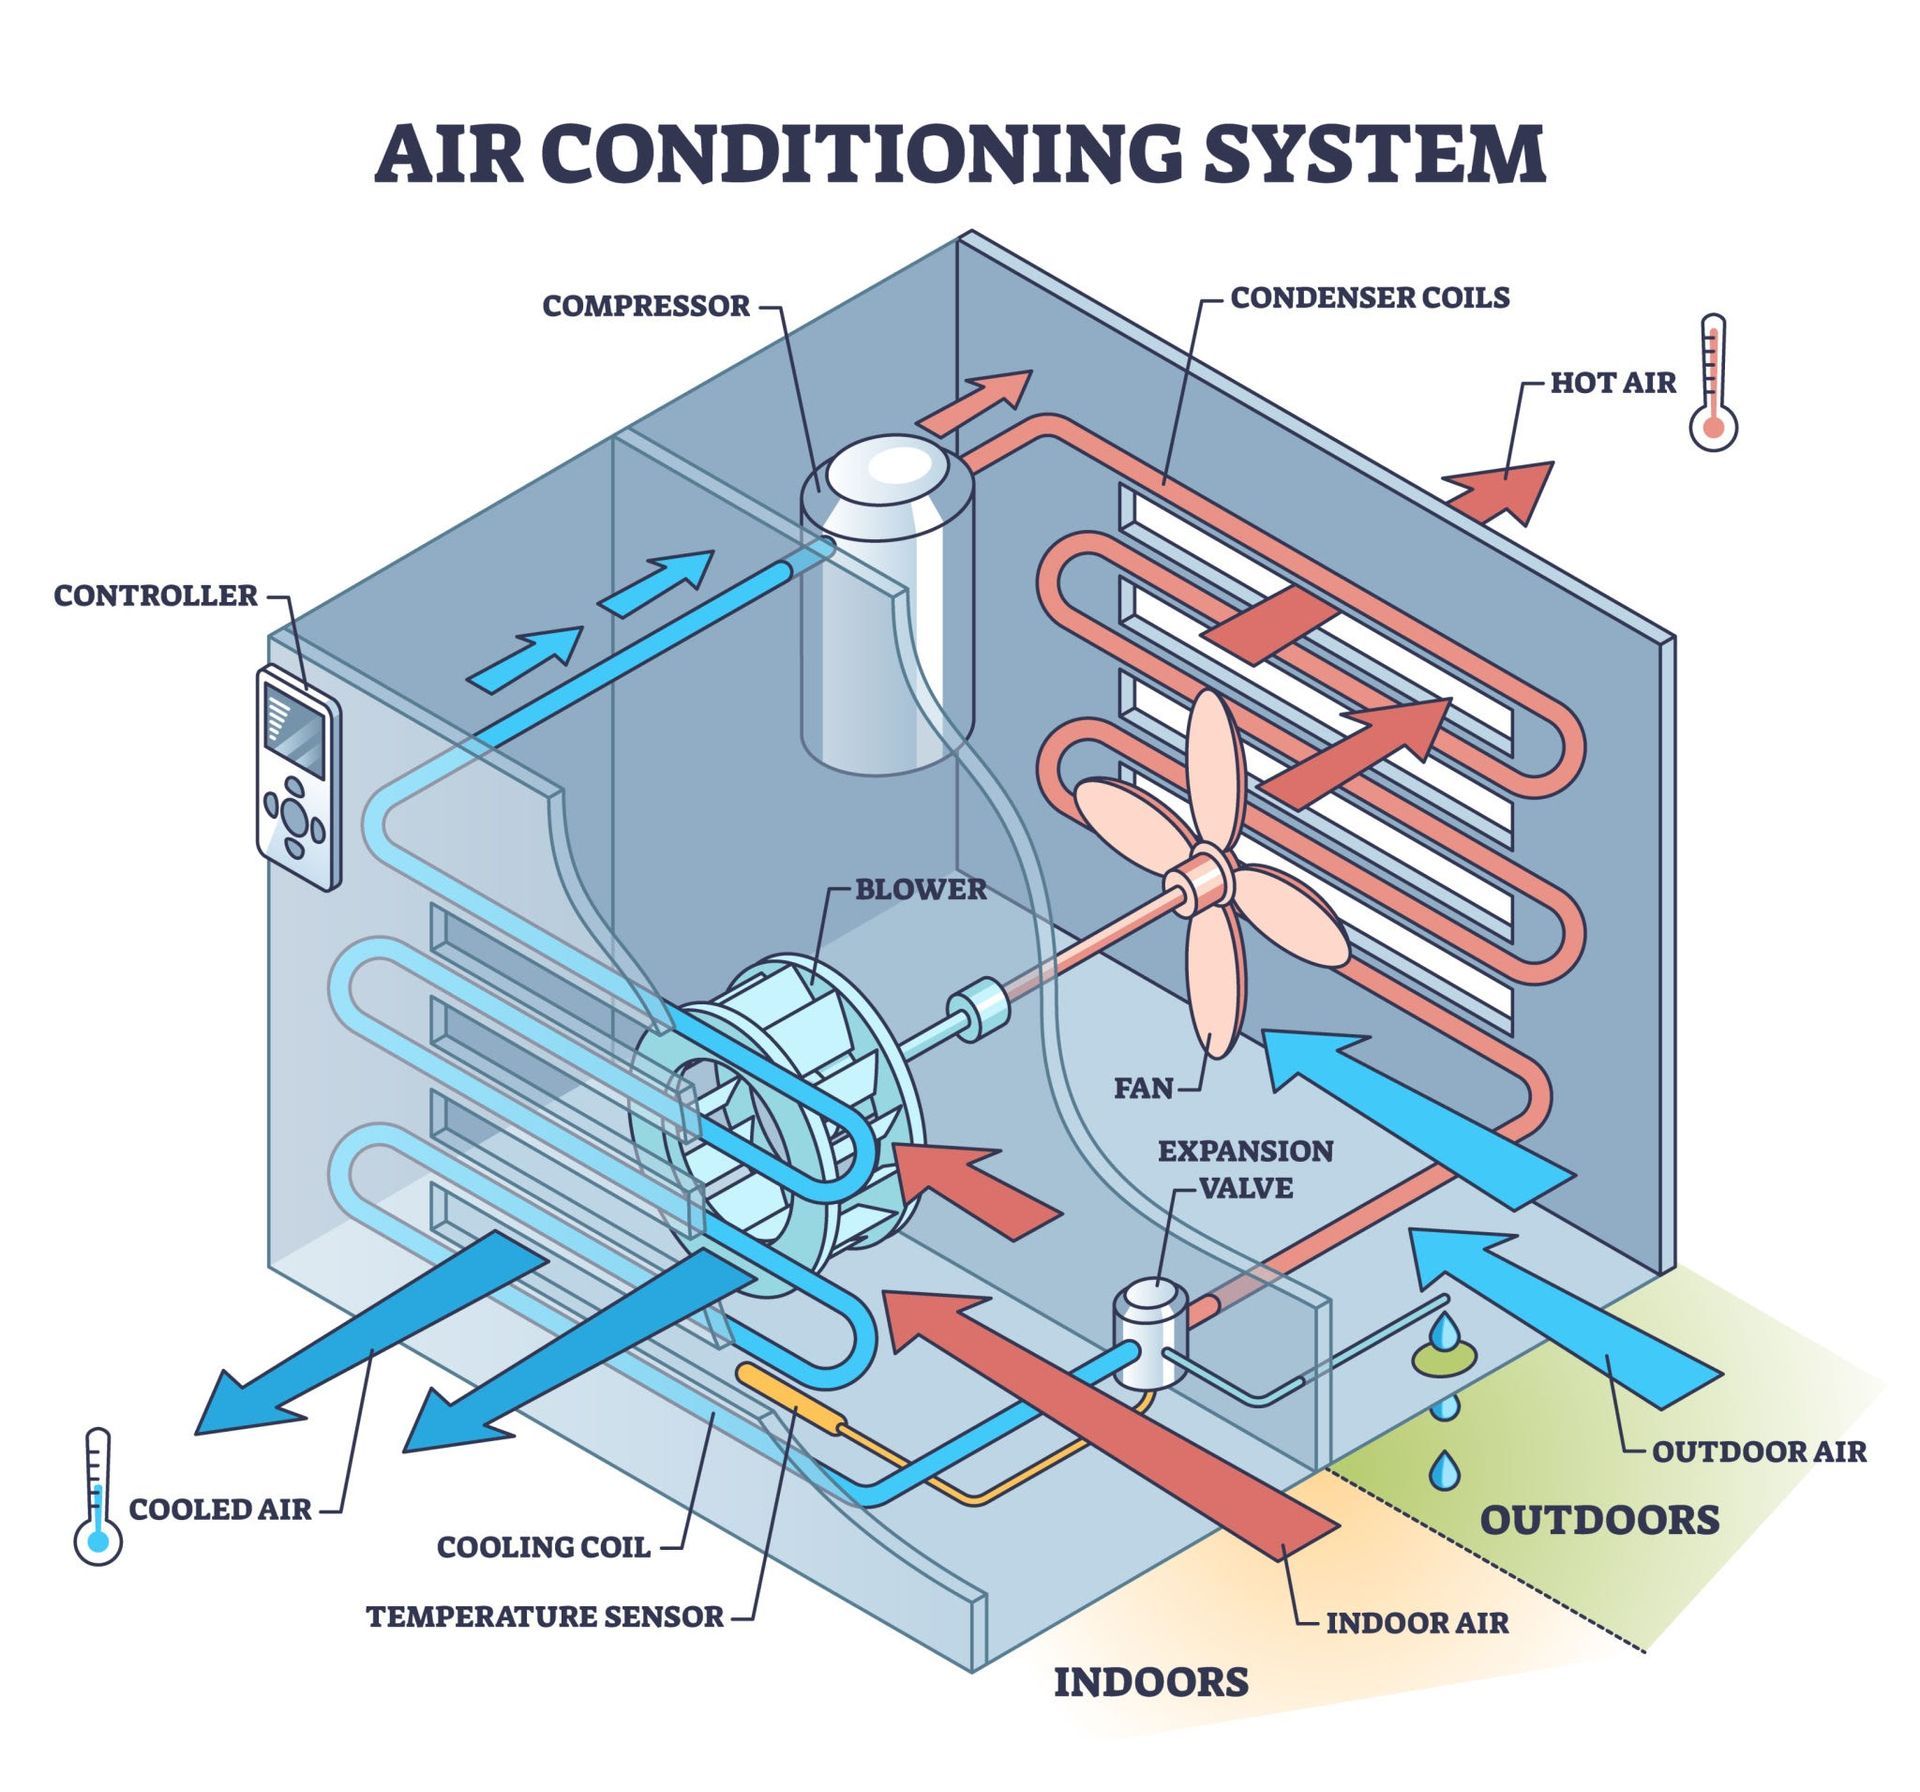
An outdoor AC unit is designed to handle weather, but major tropical systems, hurricanes, and severe thunderstorms put extreme stress on every component. Wind can throw branches and debris into the AC unit, denting fins, bending the fan cage, or damaging refrigerant lines. Heavy rain and flooding can submerge the AC unit’s electrical parts. Lightning surges can fry the AC unit’s control board, compressor, or thermostat.


Beyond the risk of immediate failure, a storm-damaged AC unit may continue to run inefficiently, leading to higher energy bills, hot and cold spots, and long-term wear that shortens the system’s life. Treating storm protection as routine maintenance for your AC unit helps prevent costly breakdowns and keeps your cooling system ready when you need it most.


Before the storm: preparation steps for your outdoor AC unit

The most important work happens before the first wind gust hits. Use this checklist to prepare your AC unit as soon as a storm watch or warning is issued.


1. Clear the area around the AC unit

Walk around your outdoor AC unit and look for anything that could become flying debris in high winds. Remove or secure:


Loose yard furniture, grills, toys, and planters near the AC unit


Garden tools, buckets, or décor leaning against the AC unit


Overhanging branches that could snap and fall on the AC unit


Ideally, keep a 2–3 foot clearance zone around the AC unit on all sides. This space not only protects the AC unit during storms but also improves normal airflow and efficiency the rest of the year.


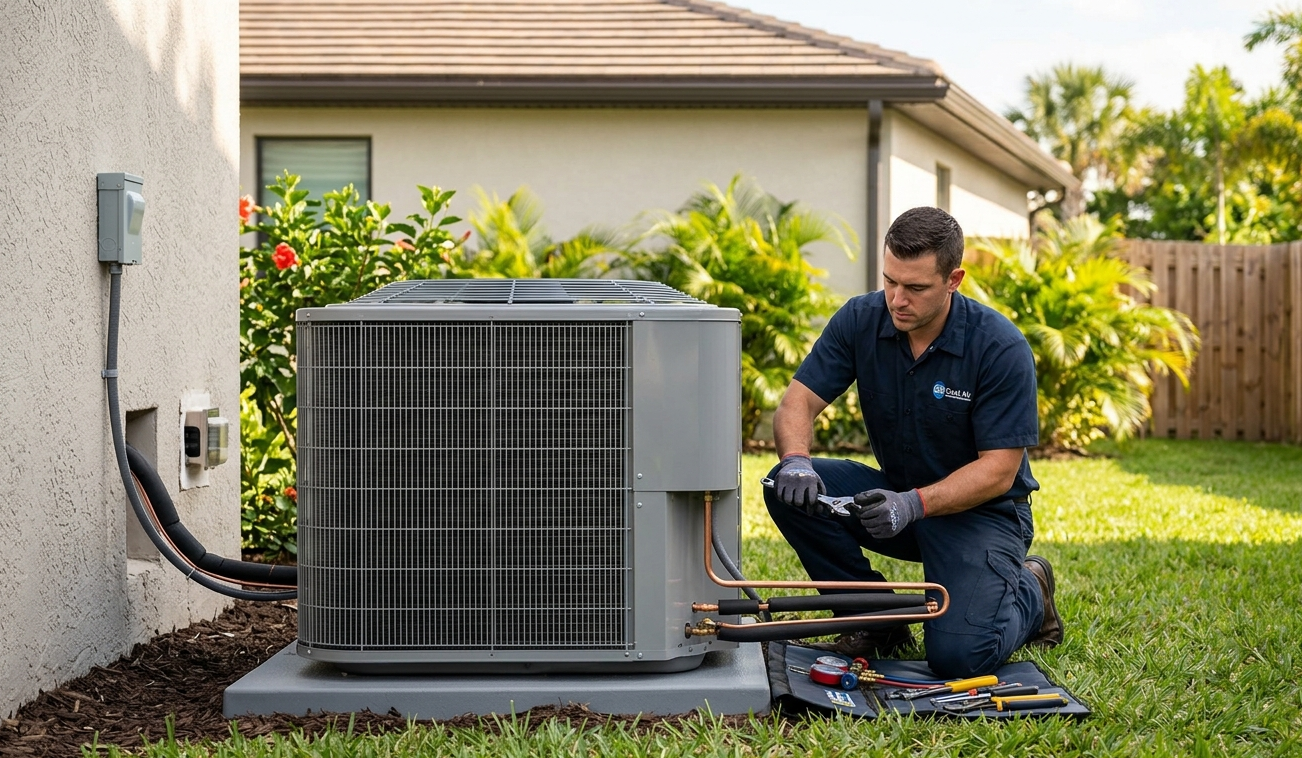
2. Inspect the AC unit for existing issues

A storm will only make existing problems worse. Before severe weather arrives, visually inspect your AC unit:


Look for bent fins, rust spots, or loose screws on the AC unit cabinet


Check that the AC unit fan guard is secure and not rattling


Confirm that the AC unit is level and stable on its pad, not sinking or tilting


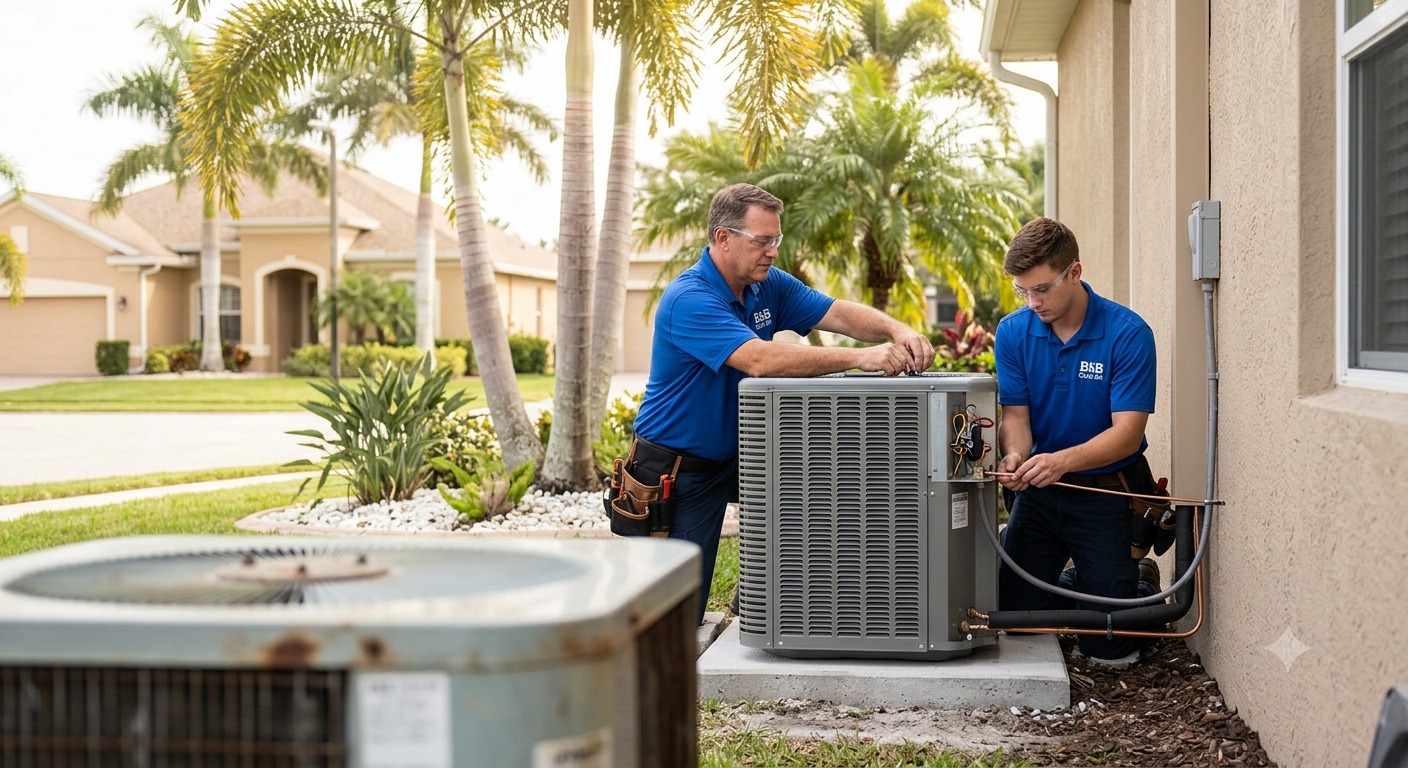
If anything looks seriously damaged or unstable, schedule a professional inspection before the peak of storm season. A healthy AC unit is better equipped to survive tough weather.


3. Trim trees and shrubs near the AC unit

Overgrown trees and shrubs around the AC unit create extra risk during storms. Branches can snap and fall directly onto the AC unit, while thick shrubs can trap debris against the condenser. Trim back vegetation so nothing touches or hangs directly over the AC unit.


Regularly scheduled trimming also helps airflow, allowing your AC unit to release heat more efficiently and run with less strain even when the weather is calm.


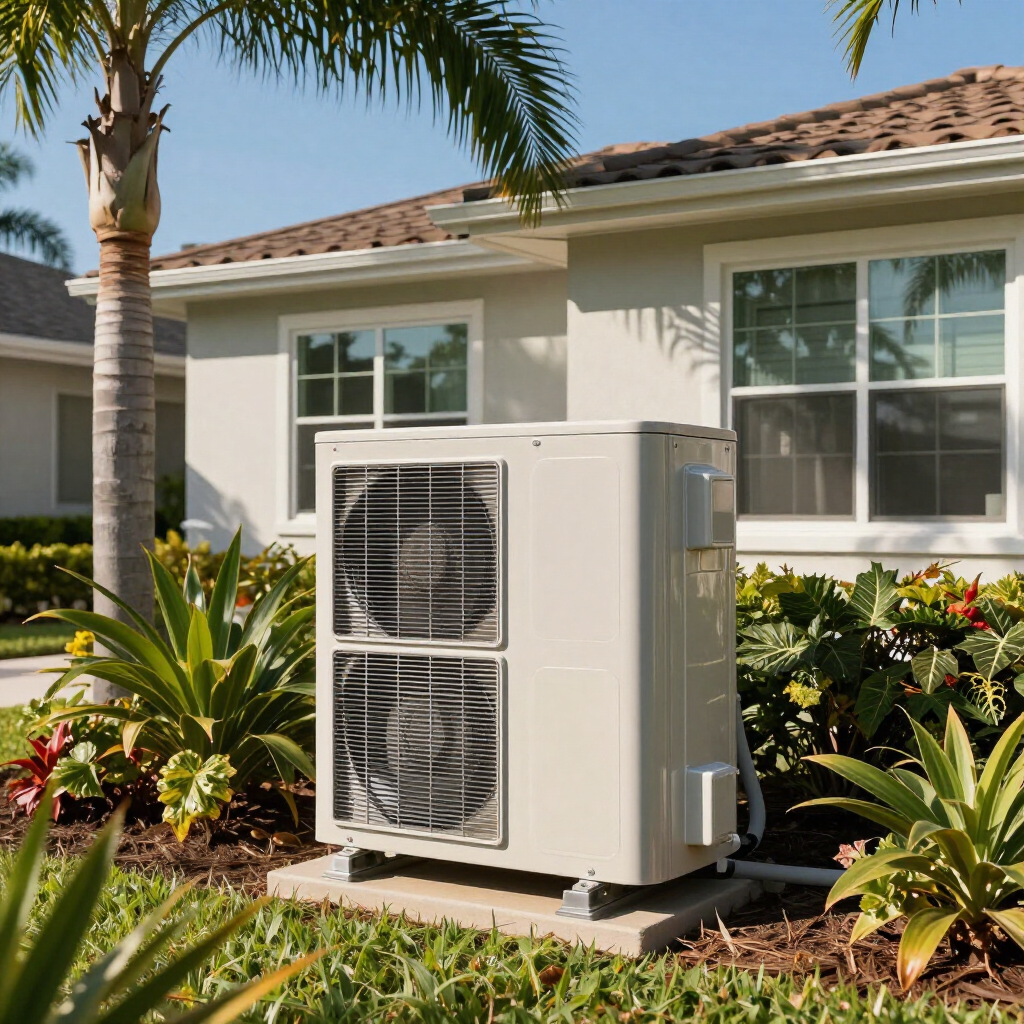
4. Elevate the AC unit in flood-prone areas

If your yard or neighborhood is prone to heavy flooding, talk with an HVAC professional about raising your AC unit on a higher pad or platform. An outdoor AC unit is not meant to be partially or fully submerged. Standing water can corrode electrical components, damage the compressor, and create a dangerous shock risk when the AC unit restarts.


Elevating the AC unit just a few inches above known high-water levels can make a big difference during tropical storms and hurricanes. In some regions, building codes now require this for any new AC unit installation.


5. Protect the AC unit’s electrical system

Surge protection is a smart investment for homes in storm-prone areas. A whole-home surge protector or a dedicated surge protector for your AC unit helps absorb power spikes caused by lightning or grid disruptions.


While no device can guarantee complete protection, surge protection reduces the chance that a single nearby strike or power surge will destroy the AC unit’s control board, motor, or compressor. Combine this with proper grounding and a licensed electrician or HVAC pro can significantly lower your AC unit’s electrical risk.


6. Decide whether to cover the AC unit

Some homeowners like to cover the outdoor AC unit before a storm to keep leaves and debris out. If you choose to use a cover, follow these guidelines:


Use a breathable, manufacturer-approved cover designed for AC units


Do not use a plastic tarp that traps moisture inside the AC unit


Remove the cover as soon as the storm passes and the AC unit is ready to run again


A snug, breathable cover can help shield the AC unit from light debris. However, never run the AC unit while it is covered, because restricted airflow can overheat and damage the system.


During the storm: what to do with your AC unit

Once the storm is near, your focus shifts to safety. At this point, the best protection for the AC unit is often shutting it down and leaving it alone until conditions are safe.


1. Turn off the AC unit before the worst of the storm

Before strong winds and lightning fully arrive, switch off your AC unit:


Set the thermostat to “Off”


If safe, flip the dedicated AC unit breaker in your electrical panel to the “Off” position


Turning off the AC unit helps prevent damage from sudden power interruptions, brownouts, or surges. It also reduces stress on the AC unit if outdoor conditions become too harsh for normal operation.


If you expect a long outage, consider pre-cooling the home earlier in the day so the interior stays comfortable for as long as possible after the AC unit is shut down.


2. Keep windows and doors closed to help the AC unit later

Even when the AC unit is off, keeping windows and doors closed helps trap cool air and control humidity. The more heat and moisture you keep out during the storm, the less strain your AC unit will face when it is safe to restart it.


Use curtains or blinds on sunny sides of the home to reduce heat gain. Avoid opening doors and windows unnecessarily, especially if the air outside is hot and humid.


3. Do not attempt to adjust or cover the AC unit mid-storm

Once winds are strong or lightning is active, stay inside and away from the AC unit. Do not attempt to:


Add or adjust covers on the AC unit


Move debris from around the AC unit


Flip breakers or disconnects at the AC unit in dangerous conditions


Wait until the storm has clearly passed and it is safe to go outdoors. Your safety is more important than any damage the AC unit might experience.


After the storm: safely bringing your AC unit back online

As soon as the sky clears, most homeowners want to turn the AC unit back on right away. Before doing that, take a few quick but important steps to protect both the system and your home.


1. Inspect the AC unit from a distance

Before touching the AC unit, do a visual scan:


Look for standing water around or under the AC unit


Check for fallen branches, heavy debris, or visible structural damage


Notice any wires hanging loose or disconnected near the AC unit


If there is flooding, obvious electrical damage, or anything that looks dangerous, do not touch the AC unit and do not reset breakers. Call a licensed HVAC technician and, if needed, an electrician. A wet or electrically compromised AC unit can be a serious safety hazard.


2. Clear light debris around the AC unit

If it is safe and there are no signs of electrical problems, gently clear away leaves, twigs, and small debris from around the AC unit cabinet. Do not remove the AC unit’s top grille or panels yourself; just focus on anything resting against the outside of the unit.


Make sure at least 2–3 feet of clearance around the AC unit is restored so air can flow freely when it restarts.


3. Check the AC unit cabinet, fan, and fins

Look more closely at the AC unit for physical damage:


Are the side panels dented or pulled away from the frame?


Is the fan cage bent or misaligned on top of the AC unit?


Are the aluminum fins badly crushed or blocked in large areas?


Minor fin damage can be corrected by a technician during a maintenance visit, but any significant bending, loose panels, or fan damage should be checked before running the AC unit. Operating a damaged AC unit can cause more expensive problems inside the system.


4. Allow time for the AC unit to dry out

If the AC unit was rained on (which is normal), it will typically be fine to restart after a short drying period once the storm has passed. However, if the AC unit sat in standing water or the water level reached the electrical components, wait and call an HVAC professional before powering it up.


Starting an AC unit that has been partially submerged can damage the compressor, blow fuses, or cause a shock. In flood-prone areas, a professional post-storm inspection of the AC unit is one of the best investments you can make.


5. Restore power to the AC unit

Once you are confident the AC unit is safe:


Ensure the thermostat is set to “Off.”


Turn the AC unit breaker in the panel back to “On.”


Wait about 5–10 minutes to allow the AC unit’s internal protections and any built-in delay timers to reset.


Set the thermostat to “Cool” and a reasonable temperature (for example, 76–78 degrees).


Listen for unusual sounds when the AC unit starts: loud banging, grinding, or buzzing can indicate hidden storm damage. If anything sounds wrong or the AC unit does not start at all, switch it back off and call a professional.


6. Monitor AC unit performance after the storm

Once the AC unit is running, pay close attention for the next 24–48 hours:


Is the AC unit cycling normally, or turning on and off too quickly?


Is the home reaching and holding the set temperature?


Are there new noises, vibrations, or hot and cold spots in the house?


Subtle changes can be early signs of refrigerant leaks, fan issues, or electrical damage caused by the storm. Scheduling a post-storm AC unit checkup can catch small problems before they turn into big repairs.


Long-term strategies to protect your AC unit from storms

Beyond reacting to each storm, there are long-term improvements that can help protect your AC unit year after year.


1. Install a sturdy AC unit cage or barrier

A professionally installed cage or barrier can shield the AC unit from larger debris without blocking airflow. These protective structures are designed to:


Withstand strong wind and impact


Leave space for maintenance and service


Allow the AC unit to vent heat efficiently


Avoid DIY barriers that are too close or fully solid, since these can choke the AC unit and reduce performance in normal weather.


2. Consider a more storm-resilient AC unit

If you are replacing an older AC unit, ask about models and installation options designed with coastal or storm-prone conditions in mind. Features that help include:


Corrosion-resistant coatings and materials for the AC unit cabinet and coils


Heavy-duty fan guards and compressor mounts


Higher elevation pads and secure anchoring to withstand wind and minor flooding


A well-chosen AC unit, properly installed for your local conditions, is more likely to survive multiple storm seasons with fewer repairs.


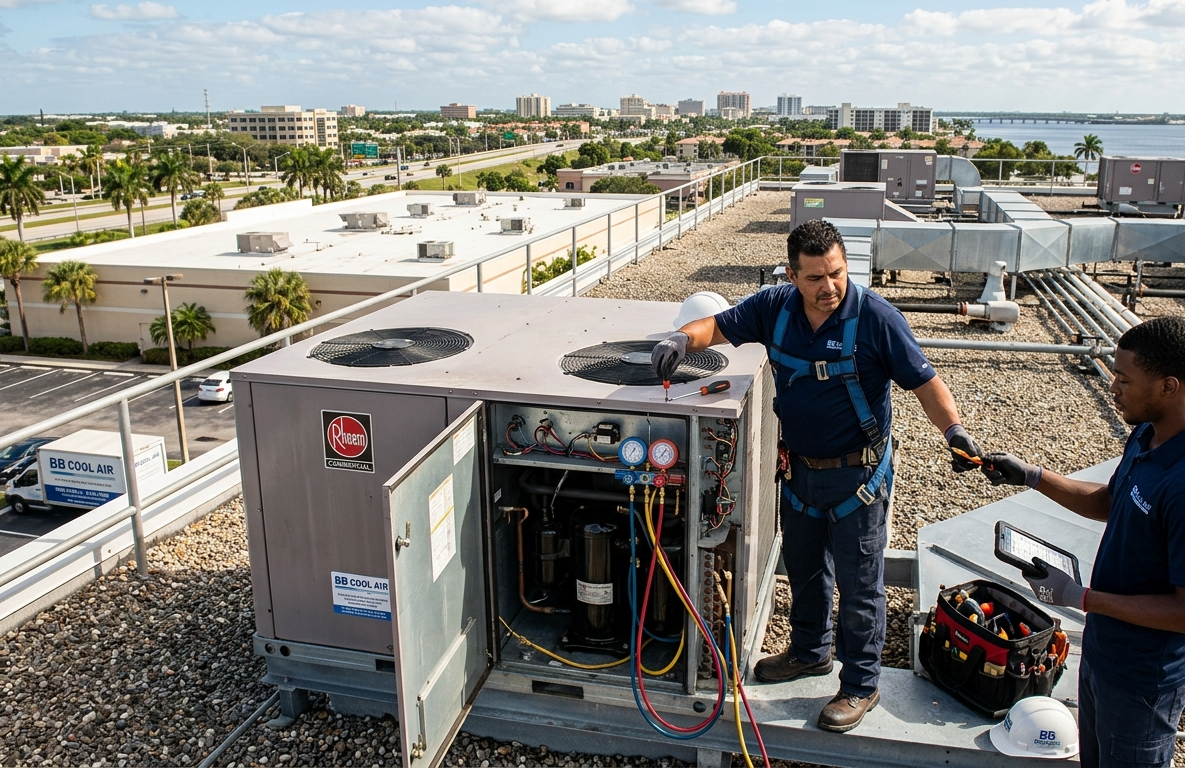
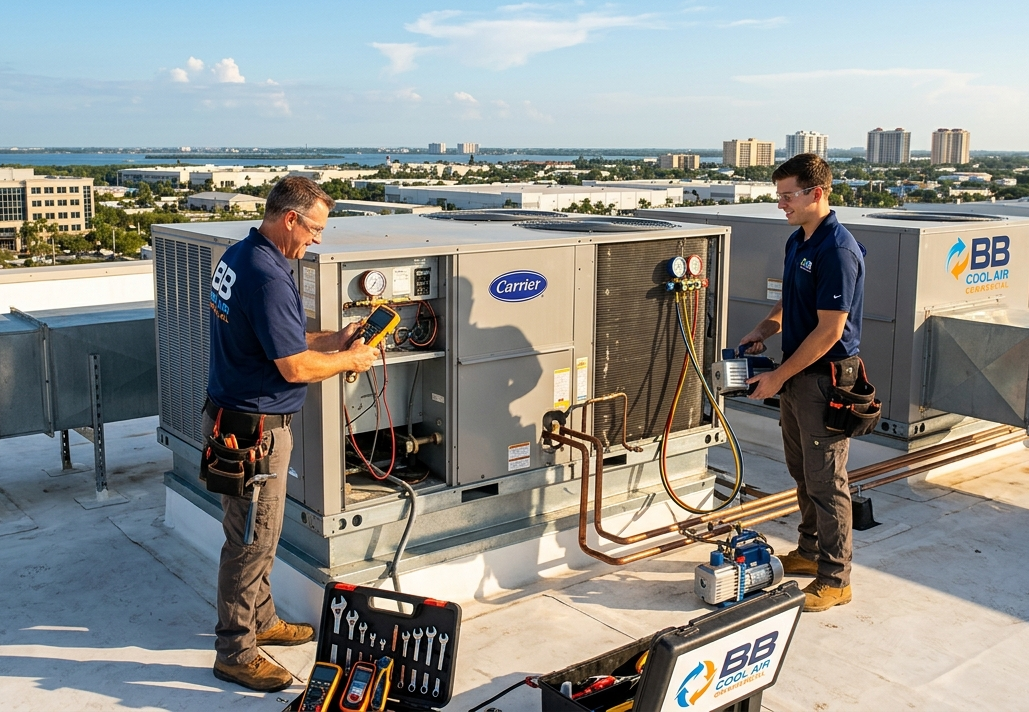
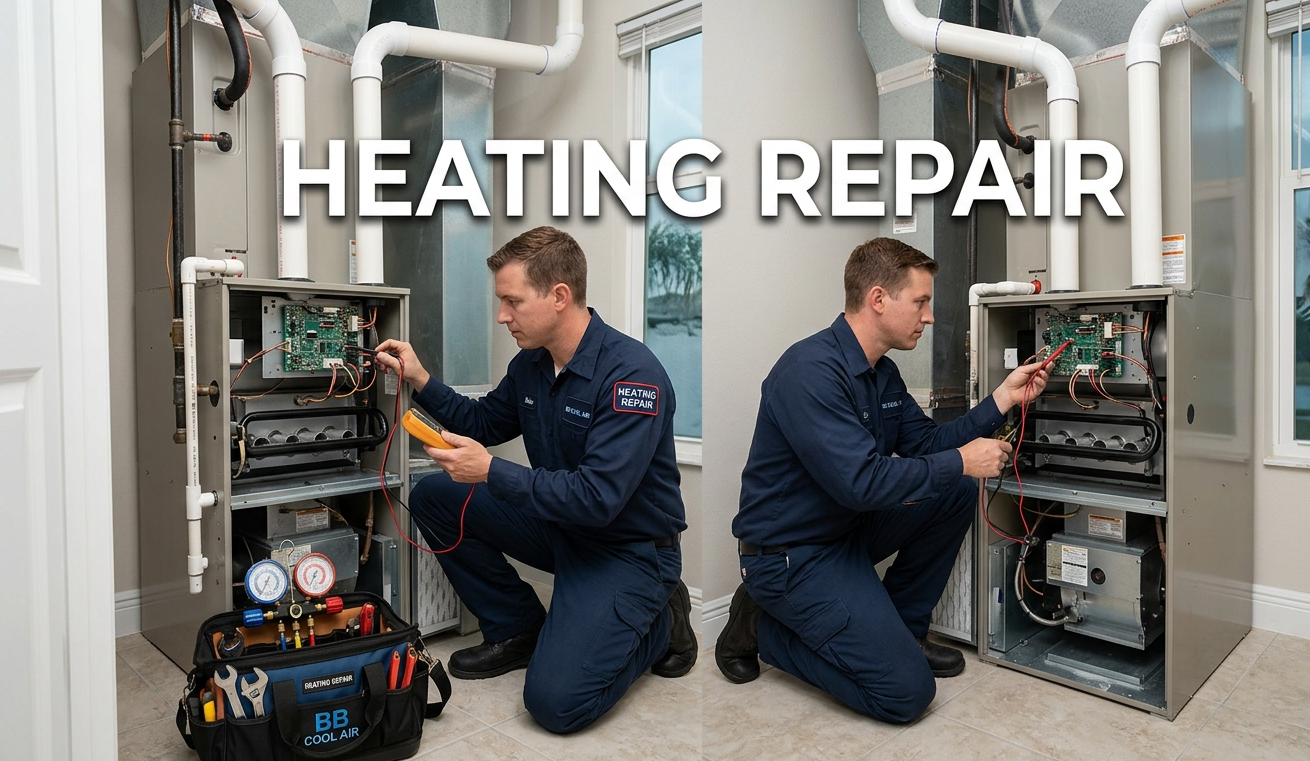
3. Enroll in a professional maintenance plan

Regular professional maintenance is one of the best ways to keep your AC unit storm-ready. During tune-ups, a technician will:


Inspect electrical connections and controls in the AC unit


Check refrigerant levels and look for signs of leaks


Clean the condenser coil and straighten fins on the AC unit


Confirm safe operation before and after storm season


Many maintenance plans also prioritize customers for emergency service after major storms, which can be a huge advantage when demand is high.


Final thoughts on storm-proofing your AC unit

Storms are a fact of life in many parts of the country, but major damage to your AC unit does not have to be. With the right preparation, safe practices during the storm, and careful checks afterward, you can greatly reduce the risk of breakdowns and protect the comfort of your home.


Treat your outdoor AC unit like any other major investment: give it space, secure its surroundings, protect its power supply, and schedule regular professional care. When the next big storm comes through, your AC unit will be far more likely to come through it ready to keep your home cool, dry, and comfortable again.

Recent Posts

By Corey Creekmore April 1, 2026
Searching for reliable AC repair in Fort Myers, Florida? B&B Cool Air offers expert HVAC installation and maintenance to keep your home cool and comfortable.
By Corey Creekmore March 27, 2026
Stay cool in Cape Coral! Learn how to maintain your AC, combat salt air corrosion, and save on energy bills with our expert guide for Southwest Florida homes.
By B & B Cool Air March 20, 2026
Heat pump services in Marco Island, FL from B & B Cool Air deliver year-round comfort for coastal homes. Learn what makes these systems ideal for your property.
By Corey Creekmore March 19, 2026
How does Florida’s humidity impact your home? Learn why humidity, not just heat, creates discomfort, strains AC systems, and how to stay cool and dry.
By Corey Creekmore March 14, 2026
1. Strategic Placement: The First Line of Defense If you are installing a new unit or moving an existing one in North Fort Myers or Saint James City , placement is your first tactical decision. Windward vs. Leeward: Whenever possible, place the unit on the side of the home that faces away from the prevailing winds. In Southwest Florida, the strongest salt-spray usually comes from the West and South. By placing the unit on the East or North side of a structure in Naples or Cape Coral , the house itself acts as a giant windbreak, filtering out the heaviest salt particles before they reach the delicate coils. Physical Barriers: Utilizing solid fencing (not lattice) or dense, salt-tolerant landscaping can create a "buffer zone." Hedges around units in Iona or Cypress Lake can catch a significant portion of airborne salt, provided the plants are kept at least three feet away to allow for proper airflow. 2. The "Freshwater Rinse" Ritual The most effective DIY maintenance for a coastal HVAC system is also the simplest: the garden hose. Salt only causes corrosion when it remains on the metal surface. Homeowners living within five miles of the coast—especially in Sanibel , Captiva , and Pine Island —should rinse their outdoor condenser units once every two weeks. If you live further inland, such as Gateway or Alva , once a month is usually sufficient. The Right Technique: Turn the thermostat to "Off" to ensure the fan isn't spinning. Use a gentle stream from a garden hose (never a pressure washer, which will flatten the fins). Spray the coils from the top down, allowing the water to carry the salt out through the bottom of the unit. Focus specifically on the corners where salt and sand tend to accumulate. 3. Specialized Coastal Coatings In the HVAC industry, we often talk about "Coastal Units" or "Seacoast Packages." These are systems where the coils have been dipped in a specialized epoxy or polyurethane coating (often referred to as Phenolic coating) during the manufacturing process. If you already have a standard unit in Port Charlotte or Labelle , you can have aftermarket coatings applied. These thin, clear films provide a barrier that prevents the salt-laden moisture from ever making physical contact with the aluminum and copper. While this adds a slight cost upfront, the ROI is massive when you consider it can prevent a $6,000 replacement just a few years down the line. 4. Addressing the "Sacrificial Anode" Much like the tech used on boat motors in the Matlacha pass, some high-end HVAC systems can be fitted with sacrificial anodes. These are pieces of zinc or magnesium that are bolted to the unit's frame. Because these metals are "more active" than copper or aluminum, the salt air will attack the anode first, leaving your expensive coils untouched. Once the anode has dissolved, you simply replace it with a new one. 5. The Role of Enclosures and Shields In high-intensity spray areas like Vanderbilt Beach or Boca Grande , some residents use "hail shields" or specialized louvers. While these are designed to protect against debris, they also serve to break the velocity of the wind. By slowing down the air before it hits the coils, the heavier salt crystals drop out of the air stream. However, a word of caution for residents in Fort Myers and Lehigh Acres : never "wrap" your unit in plastic or tight covers during the summer. This traps moisture and heat, creating a "sauna effect" that will accelerate corrosion and fry the electrical components faster than the salt ever could. 6. Electrical Protection: Don't Forget the Brains While the coils get all the attention, salt air is also a conductor of electricity. In the humid environments of Babcock Ranch or Punta Gorda , salt can build up on the contactors and circuit boards inside the outdoor unit. This leads to "tracking" or short-circuiting. During your regular seasonal checks, ensure that the electrical cabinet is tightly sealed. Using a dielectric grease on terminal connections can help repel moisture and salt, ensuring that a $200 circuit board doesn't fail because of a microscopic layer of Gulf salt. 7. Professional Chemical Cleaning While the freshwater rinse is great for homeowners in Estero and Bonita Springs , it doesn't remove the salt that has already begun to bond with the metal. Once a year, a professional deep-clean using "alkaline" or "acid-free" coil cleaners is necessary. These chemicals are specifically designed to neutralize the acidity of salt and lift out the deep-seated "white rust" that a garden hose cannot reach. For those in the high-corrosion zones of Cape Coral and Naples , this isn't just a "cleaning"—it's a chemical restoration of the system's integrity. Conclusion: Living in Harmony with the Gulf Living in Southwest Florida means accepting that the environment is "hard" on man-made objects. From the sun beating down on homes in Labelle to the salt mist rolling over Sanibel , our climate demands a higher level of vigilance. By implementing a regular rinsing schedule, choosing coated coils for your next replacement, and being mindful of placement, you can effectively "neutralize" the salt air. You don't have to choose between living near the water and having a reliable AC system. With the right preventative measures, your HVAC system can survive the Florida elements and keep you cool for a decade or more, regardless of how close you are to the beautiful, salty Gulf.
By Corey Creekmore March 6, 2026
Struggling with your AC every afternoon in Lehigh Acres? You're not alone. Discover why our local architecture and unique humidity are sabotaging your comfort.
By Corey Creekmore February 25, 2026
Florida, known for its sunshine and beautiful beaches, isn't always immune to air quality challenges. While generally good, certain factors can contribute to poor air days, impacting residents' health and well-being. But fear not! There are proactive steps you can take to combat air quality issues and breathe easier in the Sunshine State. Understanding Florida's Air Quality Landscape Florida's air quality can be influenced by several factors: Pollen: With abundant flora, pollen counts can soar, especially during spring and fall, triggering allergies and respiratory issues. Ozone: Ground-level ozone, a harmful air pollutant, can form on hot, sunny days when pollutants from vehicles and industrial sources react. Wildfires: While less frequent than in other states, wildfires can occur, releasing smoke and particulate matter that significantly degrade air quality. Saharan Dust: Occasionally, plumes of Saharan dust can travel across the Atlantic, reaching Florida and contributing to hazy skies and increased particulate matter. Practical Steps to Protect Yourself Here are some actionable tips to mitigate the effects of poor air quality: Stay Informed with Air Quality Alerts: Keep an eye on local air quality forecasts and alerts from organizations like the EPA (Environmental Protection Agency) or your local health department. Websites and apps often provide real-time data on air quality index (AQI) levels. Limit Outdoor Activity on High Pollution Days: When air quality is poor, especially for sensitive groups (children, the elderly, and those with respiratory conditions), it's best to reduce prolonged or strenuous outdoor activities. If you must be outside, consider doing so during off-peak hours when pollution levels might be lower. Improve Indoor Air Quality: Air Purifiers: Invest in a good quality air purifier with a HEPA filter to remove particulate matter, allergens, and other pollutants from your home. Keep Windows Closed: On high pollution days, keep windows and doors shut to prevent outdoor pollutants from entering your home. Regular Cleaning: Dust and vacuum regularly to minimize indoor allergens and dust. Avoid Indoor Pollutants: Limit the use of aerosol sprays, scented candles, and harsh cleaning chemicals, which can contribute to indoor air pollution. Wear a Mask When Necessary: If you're particularly sensitive or need to be outdoors on a day with very poor air quality (e.g., during a wildfire event), consider wearing an N95 mask. These masks are designed to filter out fine particulate matter. Maintain Your Vehicle: Regularly maintaining your car helps ensure it runs efficiently and produces fewer emissions, contributing to cleaner air overall. Support Clean Air Initiatives: Advocate for policies that promote clean energy, reduce industrial emissions, and encourage public transportation. Supporting local environmental groups can also make a difference. Florida's Efforts Towards Cleaner Air Florida actively monitors and manages air quality through various state and local programs. The Department of Environmental Protection (FDEP) continuously tracks air pollutants and implements strategies to reduce emissions, ensuring that the air remains clean for residents and visitors alike. Conclusion While Florida can experience periods of compromised air quality , being informed and taking proactive measures can significantly reduce your exposure and protect your health. By staying vigilant and implementing these tips, you can continue to enjoy the beautiful environment Florida has to offer, breathing easy every step of the way.
By Corey Creekmore February 19, 2026
1. Weak Airflow One of the most immediate signs of a problem is weak or inconsistent airflow coming from your vents. This could be due to a clogged air filter, issues with the blower motor, or even leaky ductwork. Reduced airflow means your heat pump is struggling to distribute conditioned air throughout your home, leading to uneven temperatures and increased energy consumption. 2. Strange Noises Your heat pump should operate relatively quietly. If you start hearing unusual noises like grinding, squealing, rattling, or hissing, it's a clear indicator something is amiss. Grinding noises often point to motor bearing issues, squealing could be a worn belt, and hissing might signify a refrigerant leak. Don't ignore these auditory warnings! 3. Increased Energy Bills Have your energy bills suddenly skyrocketed without a corresponding increase in usage? This is a common sign that your heat pump is working harder than it should to maintain your desired temperature. Inefficiency can stem from various problems, including low refrigerant levels, a dirty coil, or a malfunctioning thermostat. 4. Uneven Heating or Cooling If some rooms in your home are significantly warmer or cooler than others, your heat pump might not be distributing conditioned air effectively. This could be due to issues with zoning, ductwork problems, or even a faulty compressor struggling to produce consistent temperatures. 5. Frequent Cycling Your heat pump should cycle on and off in predictable intervals. If it's turning on and off much more frequently than usual (short-cycling), it could be a sign of an oversized unit, a dirty air filter, or low refrigerant. Short-cycling not only wears down components faster but also reduces efficiency. 6. Icing on the Outdoor Unit While some frost on the outdoor unit during cold weather is normal, a thick layer of ice building up is not. This often indicates a problem with the defrost cycle, low refrigerant, or restricted airflow. Icing can severely hinder your heat pump's ability to extract heat from the outside air, leading to a loss of heating capacity. 7. Puddles or Leaks Around the Indoor Unit Any water pooling around your indoor unit is a cause for concern. This could be due to a clogged condensate drain line, which prevents the water extracted from the air from draining properly. If left unaddressed, this can lead to water damage and mold growth. 8. Blowing Cold Air in Heating Mode (or Warm Air in Cooling Mode) This is perhaps one of the most obvious signs. If you set your heat pump to heat, but it's blowing cold air, or vice versa, something is fundamentally wrong. This could point to a problem with the reversing valve, a refrigerant leak, or a faulty compressor. 9. Foul Odors If you notice strange smells emanating from your vents, such as a burning odor, a musty smell, or even a rotten egg scent, it's important to investigate. A burning smell could indicate an electrical issue, while a musty odor might signal mold growth in your ductwork or evaporator coil. 10. Old Age  While not a direct "sign" of a problem, an aging heat pump (typically over 10-15 years old) is more prone to breakdowns and inefficiencies. Even if it's still running, an older unit might be costing you more in energy bills than a newer, more efficient model. Consider a professional inspection to assess its remaining lifespan and efficiency. Don't Delay, Call a Professional! If you notice any of these 10 signs, it's crucial to contact a qualified HVAC technician promptly. Attempting DIY repairs on a complex heat pump system can be dangerous and often leads to further damage. A professional can accurately diagnose the issue, perform necessary repairs, and help extend the life of your heat pump, ensuring your home remains comfortable and your energy bills stay manageable. Regular maintenance is also key to preventing many of these issues in the first place!
By B & B Cool Air February 18, 2026
Professional ductwork services in Estero, FL improve air quality and system efficiency. Discover expert solutions for cleaner, healthier indoor air.
By B & B Cool Air February 17, 2026
Duct cleaning in Bonita Springs, FL improves indoor air quality and system efficiency by removing dust, debris, and contaminants from your home.
Show More